Showing posts with label mod podge. Show all posts

Wednesday, April 23, 2014

First we had each other...

I made this canvas for a friend who had a baby girl recently. The quote was cut using my Silhouette Cameo, the background patterned paper is from DCWV, I added a generous dose of sparkle Mod Podge over the entire canvas.......love love love the shimmer :)
I also added a customized photo frame (yup you guessed it the baby's name is Saannvi ;) )  to complete my handmade gift set.

Tuesday, January 14, 2014

There's no place like home


 Sharing another canvas I completed recently...I intended to gift it to a colleague for his house warming but DH felt it is too bright and kiddish......so I landed up keeping it for myself.
Painted the background with distress paints......love how they react to water. The house and quote are Silhouette cut. I tried modeling paste for the first time (for the clouds)....the 3D effect is awesome.
Thanks for visiting!
Wednesday, December 4, 2013

Wedding anniversary shadow box


Shadow boxes have been on my mind for long, last week I finally got around to making one. I made this for my parents who celebrated their 40th wedding anniversary this November.
I first painted the MDF shadow box black and added some patterned paper at the edges and inside the box partitions. Added photos in three partitions and covered everything with a generous layer of Mod Podge. I finally embellished the box with MDF, chipboard and metal embellishments.
Supplies used:

  1. 12x12" MDF shadow box
  2. Gesso and Black acrylic paint
  3. K & Company patterned paper
  4. Mod Podge
  5. Tim Holtz tattered floral die
  6. Tim Holtz distress paint
  7. Mdf embellisments from here and here
  8. Metal embellishments are from a RAK from Mallika
  9. Flower centers are from my stash

Thursday, November 28, 2013

Photo Magnet Tutorial

Photo magnets are incredibly to make, things you would need:

  1. Soft Magnet sheet (I got mine from here). You could use an old fridge magnet
  2. Mod Podge
  3. Card Board
  4. scissors/corner rounder/die. 
  5. Brush or any other applicator
Here's Kriti busy with the supplies :)
First up I die out the cardboard, magnet sheet and photo. I used a Tim Holtz alterations die as it can cut through cardboard and magnet easily.
Put all the layers together with Mod Podge and cover the photo with a generous layer of Mod Podge (you could use Glossy accents or any other glue and gloss) and you are done!
Hope you enjoyed this short tutorial.
Thanks for visiting!

Tuesday, October 29, 2013

Nameplate for a teenager

 I like to make personalized gifts for all the kids whose birthday parties Kriti is invited to...I was at a complete loss about what to make for my neighbor's teenage daughter (I had already gifted her a scrapbook last year)....so I came up with a nameplate for her room...I hope she likes it.
And here the nameplate all wrapped up.
Linking upto: Itsy Bitsy anything goes challenge - the background PP and alphas for "room" are from Itsy Bitsy.

Sunday, October 27, 2013

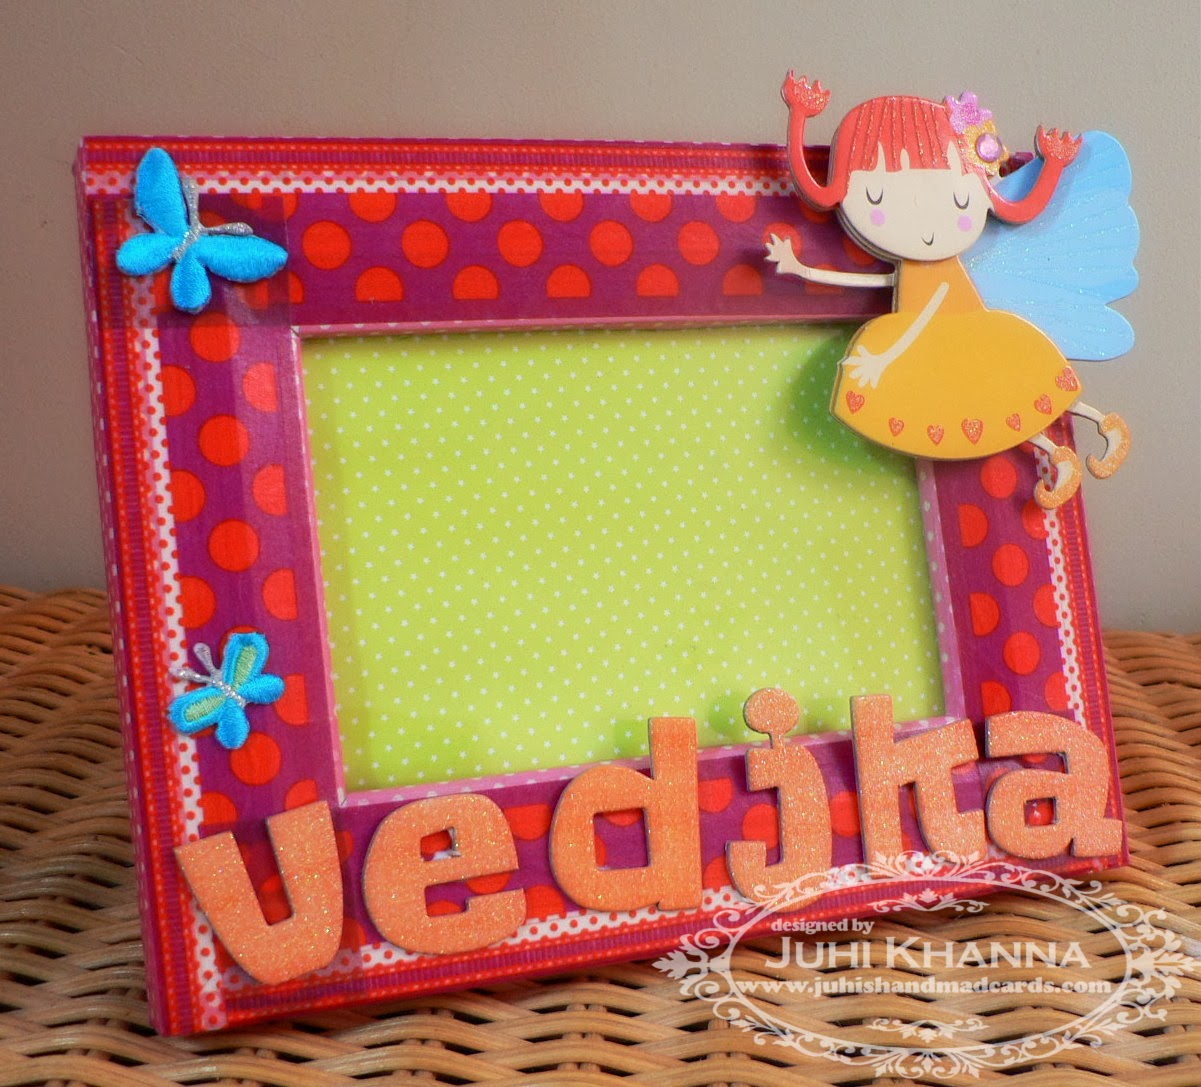
Personalized Baby Photo Frame

Even though I have been MIA from my blog for a long time I have been crafting regularly, mostly on various home improvement/decor DIY projects, custom orders and personalized gifts. I am just a beginner when it comes to home decor DIY (have been working on making my own curtains, fitted sheets, tea light holders and so on). I believe most of my DIY projects are not good enough to share here.....might start sharing some once I get better. Will be sharing a few of the custom orders too in the coming weeks...now onto the baby photo frame.
I started out with this cheap looking metal 4x6" store bought photo frame ...
and converted it to this using washi tape, 3-D chipboard stickers and a few embroidered butterflies.
applied a generous coat of Mod Podge all over the washi tape for protection.
And here is the package all set to be gifted to my little neighbour......for the packaging I've taken a plain brown paper bag and stamped baby elephants on it....love the end result! 
Thanks for visiting!

Tuesday, May 28, 2013

Something useful

Here's something useful I did with my Cinch binding machine. I bound my mother-in-law's book whose binding had come off. I made the cover by covering up a piece of cardboard with some fabric using Mod Podge and adding some die-cuts on the top. 
Thanks for visiting!

Sunday, May 26, 2013

Upcycled Tin with fabric flowers

I am obsessed with tin makeovers these days. I have a huge stock of milk powder and milk supplement tins used by my daughter and mother-in-law.....

I started off with with this tin
covered it up with some scrap fabric using Mod Podge and added some paper ribbon.
For the fabric flowers I followed this tutorial. If you are as lazy as me when it comes to fussy cutting you can try this instead of cutting neat circles using a template- simply folded your approximately square piece of fabric multiple times as shown in the pictures and chomp off the top: shown by the black line in the central image of the collage (do forgive the crumpled fabric). You will get some sort of a crude circle which still gives you a beautiful flower...the ones I made are proof (ie if you find mine beautiful :P)
These flowers were soooo easy to make, by far the easiest fabric flowers I've tried my hand at!
I've used chenille sticks instead of floral stem. I found that chenille sticks are not able to take the weight of the flowers too well but they do give the flowers a nice wobbly effect. I hot glued the stems to the inside of the tin to keep the flowers in place.

linking up to:
Lessology #25 for the love of fabric

Wednesday, May 15, 2013

Flip-Flop Makeover

Shoe makeovers seem to be the thing for me these days.......I started off with these old pair of hush puppies
 flip-flops and an old pair of jeans. I cut off the hem from the bottom of the jeans and rolled it into flowers (for use on another project).
These flowers were made by die-cutting denim scraps and layering...one layer is the front of the denim and the other is the reverse. These flowers are actually stitched onto hair clips.like this tutorial.....I wanted to make cute clips for my daughter but it turns out that she hates putting anything on her head/hair and would pull them out immediately so I went ahead and clipped them onto my flip-flops! The cute wooden buttons are from Pie Lane.
The good part is since they are clips I can remove them or put them back on whenever I want.


Tuesday, May 7, 2013

Mod Podge shoe makeover

There are tons of Mod Podge shoe makeover tutorials available over the internet, here's my take.
I started off with these boring red canvas shoes, I've hardly worn them, I wonder what I was thinking when I bought them!

You will need:
Old pair of shoes
Fabric Scraps big enough for the part of your shoe you want to cover
Mod Podge
Big Flat Brush/Sponge to apply the Mod Podge
Old newspaper
scissors
hot glue gun (only needed for the bow on top)
I decided to cover my shoe only partially, you can also cover it completely, a great tutorial on how to do that can be found here.
Nothing much to say, just cover the parts of your shoe where you want to put the fabric with a thick layer of Mod Podge and carefully stretch and place your fabric over it. Work in sections as Mod Podge tends to dry fast. Keep stretching and removing any folds in your fabric as you work along the sections. Leave to dry for about half an hour, once dry carefully cut off excess fabric. Apply a thick layer of Mod Podge over the fabric (don't worry Mod Podge dries to a clear finish) and let it dry and you are good to go! I also added a fabric bow to finish off my shoe.

Here's how I made it:
  1. Take three strips of roughly cut fabric as shown in the picture. My strips measured approximately 6"x1", 4.5"x1" and 1.5"x0.5". The dimensions don't have to be exact, cut the longest strip a little over double the desired length of your bow and adjust the other strips' dimensions accordingly.
  2. Fold and hot glue the first 2 strips from both ends as shown in the picture.
  3. Place the smaller bow on top of the larger one and hot glue them together.
  4. Scrunch up the bow from the middle and hot glue it in place.
  5. Wrap the third fabric strip tightly around the middle and hot glue it in place and your bow is ready.

Hot glue your bow on to the shoe and you are done!
Hope you enjoyed my short tutorial.....
I just discovered that my shoe make-over project is a perfect fit for this month's challenge at the lessology blog - Challenge #25: For the love of fabric......I'm not if this is acceptable cause I posted this post on 7th May but I am linking it up to the challenge on 15th May....

Thanks for visiting!